Showing posts with label food. Show all posts

9.11.12

apple cinnamon rolls

Good morning wonderful friends!

Today I have an incredibly delicious (and probably borderline sinful) recipe for you!

Yesterday it was snowing and I decided it was the perfect time to try out a recipe I've been holding onto. Apple cinnamon rolls, y'all!

I adapted this recipe from here. Ready? Here we gooo! You will need:

Dough
5 cups of all-purpose flour (separated)
2 cups milk
1/2 cup vegetable oil
2 teaspoons ground cinnamon
1/2 cup sugar
1/2 teaspoon of salt
1/2 teaspoon baking powder
1/2 teaspoon baking soda
1 packet of active yeast (1/4 oz. or 2 1/4 t)

Filling

Apple Filling
3 medium apples, chopped into small cubes (about 1 1/2 - 2 cups chopped)
3/4 cup brown sugar, packed
3 tablespoons ground cinnamon

Cinnamon filling
1/2 cup brown sugar
1/2 cup granulated sugar
1 tablespoon ground cinnamon

1 cup of butter, melted (2 sticks)

Frosting
1/2 cup butter, melted (1 stick)
1 1/3 cup of powdered sugar
1/2 teaspoon salt
4 teaspoons pure maple syrup
1 teaspoon vanilla extract


To prepare the dough, heat milk, oil, cane sugar and cinnamon for 5-8 minutes (do not boil). Pour milk into a large mixing bowl and let it reach lukewarm temperatures (to the touch) for about 10 minutes.

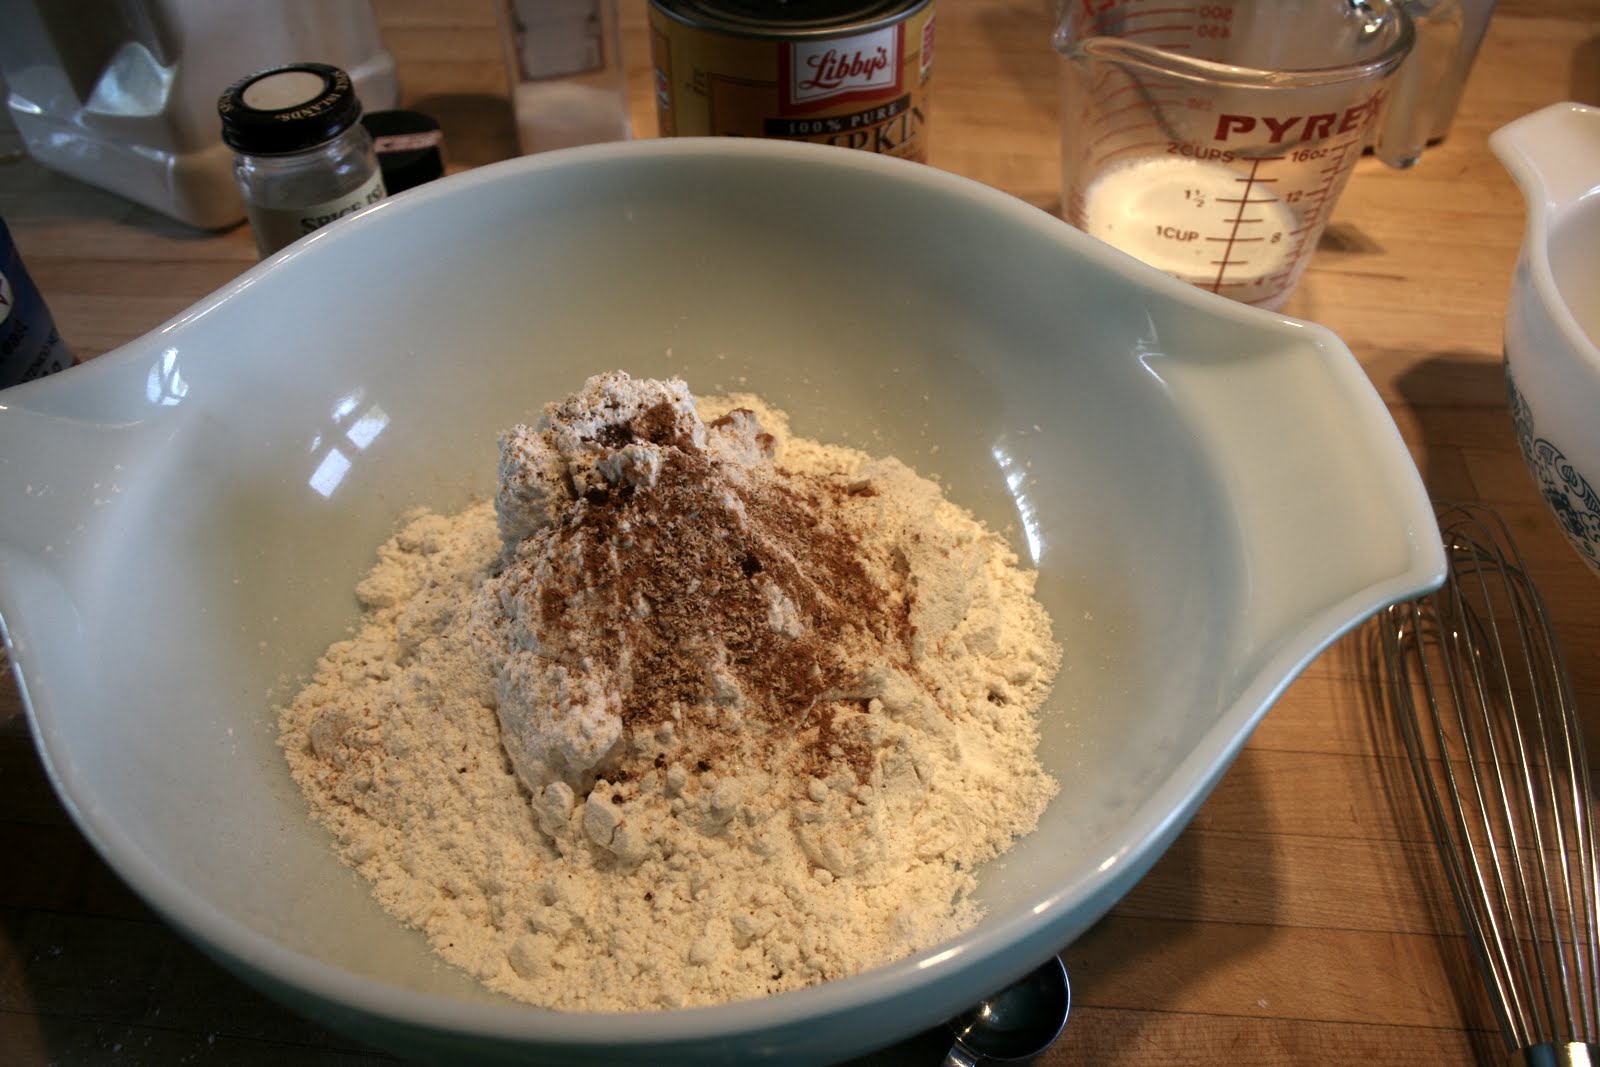
Once milk is lukewarm to the touch, sprinkle packet of yeast on top and let it set for one minute. After a minute has passed, pour in four and a half cups of flour and mix until incorporated nicely. Cover bowl with a clean kitchen towel and let dough rise for one hour in a relatively warm area.

After one hour, mix in last 1/2 cup of flour, baking soda, baking powder, and salt. Cover with a kitchen town again while you prepare the filling.

Preheat oven to 375 degrees Fahrenheit.

For the filling, heat up 1 cup of butter and brown it. Be watchful not to burn the butter by looking out for the center of the boiling butter. When the center forms a caramel color quickly remove it from the stove-top and set aside. Then in a small bowl mix apples, brown sugar and cinnamon together. In another bowl mix the cinnamon sugar filling.

Place dough onto a well floured surface and begin to roll it into a thin, long rectangle. I split my dough in half, and ended up getting around 22 rolls from it all. I'd say it varies though, depending on how big and thick you want your rolls to be. 


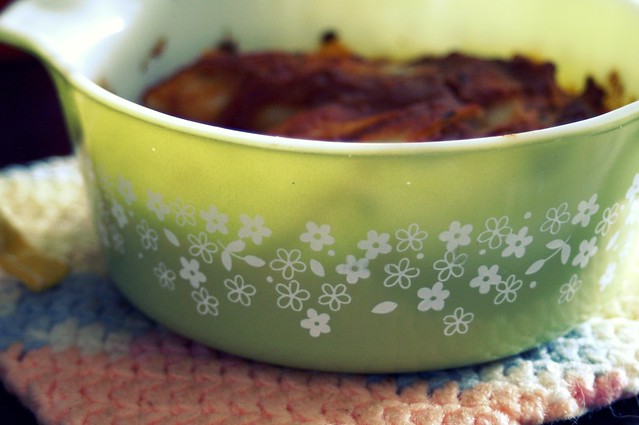
Once filling components are ready, spoon 1/2 of melted browned butter onto rolled out dough and spread evenly with spoon or pastry brush. Then evenly sprinkle on sugar and cinnamon mixture, followed by chopped apples mixture. Take long end, closest to you, and start to tightly roll dough with filling (try to keep the roll as tight as possible). Once dough and filling has been rolled into a log, pinch the seams shut. Using a sharp knife, slice 1 1/2 inch slices and place into a greased baking pan. be careful not to overcrowd the rolls. I made 9 of mine in a 9" cake pan and the other 13 in a glass pyrex pan. 

Bake for 18-20 minutes, or until lightly golden.


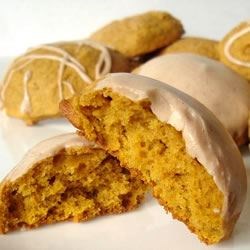
For the frosting, melt 1/2 cup of soft room temperature butter for 20 seconds in the microwave. Remove, and add sugar. Stir well and place in the microwave for another 10 seconds. Remove, and stir vigorously. Add in the maple syrup and vanilla. Keep stirring! Once the frosting has reached a thick consistency, you're golden!

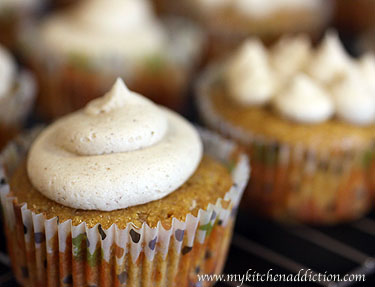
Pour frosting evenly over cinnamon rolls and serve warm.


 And now you can enjoy. These are so delicious - be warned, they may cause you to want to work out. Or not. 

Let me know if you make them - and what you think!

xoxo, Ruthanne

26.4.12

the best chocolate cupcake & cream cheese frosting


this is by far my favorite recipe ever - it's sooooo yummy, and soooo easy. ready?

what you'll need:
1 box of chocolate cake mix - I prefer devils food, but regular is okay too.
2 large eggs
1/3 cup water
1/2 cup sour cream or greek yogurt, plain
1 box of chocolate pudding (the small one - not the huuuuuge box, ya know?)
buttermilk for thinning (less than 1/2 c.)

frosting:
1 stick unsalted butter, room temp
1 package of cream cheese
1 tsp. vanilla extract
about 3-5 cups powdered sugar, depending on how thick/sweet you like it

for the cake:
preheat oven to 350 degrees.

line your muffin tins with liners and spray with a nostick cooking spray.

in the bowl of an electric mixer, combine the cake mix, eggs, water, and sour cream/greek yogurt. mix well for one minute. add the pudding and beat well - batter will become very elastic like - now add buttermilk to thin out the batter a bit. you want to retain the elasticity and somewhat thickness of it, but it needs to be pour-able.

using an ice cream scoop, fill each liner with batter and place in oven. Bake for 17-25 minutes, depending on your altitude. (I'm at 7000 feet...so, it will be different than what I do if you're lower than me...which you probably are..)

after the cupcakes are done baking, let cool completely. otherwise when you frost them....it's no bueno.

now, for the frosting.

beat the butter and cream cheese together for about 2-3 minutes until well combined. add vanilla. slowly add the powdered sugar in increments, until you like the consistency.

I always frost my cupcakes with a piping bag, using a regular round tip for a nice swirl effect.

frost your cupcakes and enjoy! I've never had a complaint about these suckers, and they are definitely my favorite too!

28.3.12

yummy berry cream cheese


you will need:
1/2 cup frozen or fresh berries
1 package (8oz) of cream cheese
1-2 tbs. sugar
bowl (I used a 4 cup pyrex measuring glass - it was easier to hold)
spoon & whisk

note: you can use an electric mixer too, it works splendidly for this. I just find it more work than necessary for this particular recipe.

instructions:
if your berries are frozen, microwave them for about 10 seconds at a time until they are nice and soft, but not hot. drain off most of the juice.

add about 1 tbs. sugar to your berries and mix well.

place your cream cheese in the bowl of your choice, and stir it up! you want it to be fairly easy to stir and smooth.

add the berries to the cream cheese and mix really well. you may want to bust out your whisk now...

once everything is incorporated and smooth, taste to check the sweetness, and add more sugar if needed.

place in an airtight container and refrigerate. I've found it's good for up to 8 or 10 days, but I never let it last that long!

it's delicious on bagels, graham crackers, cupcakes, you name it. 

enjoy!

happy wednesday friends, have a lovely, lovely day! 

xoxo, ruthanne

16.3.12

mmmm.


I made this beauty yesterday..

it was fantastic.

and it looked realllllllly pretty too. 

always a bonus, right? 

maybe I'll share the recipe with you next week. eh?

okay, we'll do that.

3.2.12

guest post: hannah of 17 inch heart

Hi Ruthanne lovers! I'm Hannah from 17 Inch Heart. Don't you just love when you make new friends? I think it's probably just about the best feeling out there! I admire Ruthanne's beautiful little blog- and not to mention she is sweet as pie...or in this case, cupcakes! Not going to lie, I kind of have a little addiction!


But with Valentines day right around the corner I thought I'd share a yummy recipe that's easy and perfect for such a happy day!


Strawberry Lovecakes

Ingredients: 4.5 cups cake flour, 3 cups sugar, 5 1/4 teaspoons baking powder, 3/4 teaspoon salt, 1 cup pureed frozen strawberries, 8 egg whites, 2/3 cup milk, 1 or 2 drops of food coloring
The process: Preheat the oven to 350 and line pan with cupcake liners. With an electric mixer, combine flour, sugar, salt and baking powder. Add the butter and strawberry puree and then mix to the blended ingredients. Raise the speed to medium and beat until it resembles ice cream! In another bowl, whisk together egg whites and red food coloring. Add this mixture to the other ingredients. Bake in oven for 15-18 minutes. Remove from heat and let cool after baking! Then eat up!

-

Hope you love 'em :)
for more giant sized fun, follow me over to my little corner of the blogosphere @17inheart.com :)

-----------------------

isn't she adorable? I just love her :) And her love of cupcakes! Eep! Head on over to her blog, friends - you will love it!! :)

hugs!

-Ruthanne

31.12.11

Recipe Guest Post - Michelle of Oh, Mishka! (& giveaway winner!)

Hi all! So, I have one last treat for you before we ring in the new year :) Have you ever stopped by Michelle's blog? Have you fallen in love with it like every normal person? Have you totally become addicted? Yeah. Ha. Funny. ME TOO. I asked Michelle if she would like to do a guest post for y'all with a yummy new years eve recipe! And she was so sweet to stop and get one to me for you, even in the midst of JUST GETTING ENGAGED! :) I'm very excited for her, is it obvious?? Here you are, my lovelies! 

-------------------

 Hi Ruthanne with an E readers! I'm Michelle and I write the blog Oh, Mishka. Ruthanne asked me to share one of my favorite holiday recipes with you. Since I adore having friends over for a cozy night in for New Year's Eve, I thought I'd share a recipe that is incredibly easy, but looks really impressive at a dinner party. :) These pesto stuffed shells were a huge hit when I made them, and I'm already planning to make them again soon. Even though they look messy (and incredibly unphotogenic!), they're beyond delicious.

  PICT5540 Pesto Stuffed Pasta Shells \
recipe adapted from here 

 1/2 package jumbo shell pasta 
15 oz container of ricotta (I used part skim) 
1 cup shredded mozzarella 
1/2 cup basil pesto 
1 egg 
1 jar pasta sauce 

 1. Preheat the oven to 350 degrees F. 
 2. In a large pot, cook the pasta. The box will tell you to bring the water to a boil before adding the pasta, and this is important. Otherwise your shells might stick to each other and tear. 
 3. While the pasta is cooking, mix together the ricotta, mozzarella, pesto, and egg in a large bowl. Set aside (or refrigerate) until ready to use.
 4. In a baking dish, spread one cup of the pasta sauce evenly across the bottom. (I used an 8x8 baking dish, but had too many shells left over, so I also filled one of my vintage Pyrex dishes.)
5. When the pasta is cooked, drain it and rinse gently with cold water. Then pick up one pasta shell and fill it with a spoonful of the ricotta mixture. The filling should fill the shell enough that the top is spread open about a half inch (about a spoonful). Place the filled shell on top of the pasta sauce in your baking dish. Continue to do this until all of your shells are filled. 
6. Spread the rest of the pasta sauce evenly across the top of your filled shells. Bake at 350 for 30 minutes, then enjoy!

------------------

doesn't it look and sound divine? I'm totally making this soon! Eep! Happy last day of 2011, all!

Xoxo,
 Ruthanne

Also! We have a winner of the My Memories software! Melissa, of Contemporary Dancing! congrats :) Email me when you get the chance and we'll get everything worked out! :)


Happy new years eve!

21.12.11

recipe guest post: the letter 4

Hey there everyone! I have another special guest for you this week! :) Jade from The Letter 4 is here to bless you with an amazing (and I do mean ah-maz-ing) cookie recipe that all four of the girls loved while growing up! I have a confession for you....I kind of just really adore these girls. So. Stinking. Much. I mean really. I do. So, without further ado, take it away miss Jade! :)

-------♥-------

Hey there! I am so excited to be here today at Ruthanne with an E!
My name is Jade and I blog over at
We're just 4 sisters who love crafting, cooking, design, photography, and anything and everything that inspires us!
I loved when we were growing up, how my mom would make batches and batches of these addicting cookies and then would lay them nicely in a square tupperware like this...
.. and I would go in to the kitchen and sneak one, and hide out while I ate it, (probably along with everyone else, come on siblings...fess up!)  I would go sneak another, and another, and another...and then I would hear my mom go into the kitchen later and say, "Oh my gosh, where did all the cookies go already?!"  
Well, I don't have to sneak them anymore, but I'm sure when my kids get a little taller, they will.  :)
Love you mom!  I wish we could make, and eat these together.  
PS, I'm partial to the applesauce for this recipe, but if you want to make an awesome pumpkin cookie, use this same recipe but just substitute the applesauce with pumpkin puree.  
Mom's Applesauce Cookies:
Preheat oven to 400 degrees
4 cups all purpose flour (OR: 2 cups whole wheat, 2 cups all purpose) 
2 tsp. baking soda
1/2 tsp salt
1 1/2 tsp ground cloves
1 1/2 tsp cinnamon
1 tsp nutmeg
1 cup butter, softened
1 cup brown sugar
1 cup white sugar
3 eggs
2 cups applesauce or pumpkin puree
2 cups nuts (optional)
2 cups chocolate chips (NOT optional)  haha.
2 cups raisins  (OR do it my way, and omit the raisins and add more choc chips!) 
1)  Combine all dry ingredients.
2)  Cream butter, then beat in sugar.  Add eggs one at a time and beat well.
3)  Add applesauce to butter mixture, stir a bit, then add flour mixture to butter mixture.  Stir together with a spatula by hand.
4)  Add nuts, raisins, and chocolate chips.  Stir in evenly.
5)  Place dough in fridge overnight.
Spoon out rounded tablespoons onto a cookie sheet.
Bake in oven for 10-12 minutes. 
My mom and I like them best when you let them cool completely, when the chocolate chips have had a chance to harden up a little bit.  My hubby likes them hot and the chocolate chips melted.  Whatever way you decide....ENJOY!  
Don't forget to come over to our blog and say hi!
Thanks for having us at your cute blog Ruthanne!

------

Thank you so much Jade! Seriously guys, head on over to their blog...if you don't follow it, do that too, because honestly, they're just so fantastic and inspiring! Like I said earlier.......I have an extreme obsession with them and their blog and yeah :)

Much love, and happy wednesday!

-Ruthanne

p.s. did you enter my giveaway yet? You should! :)

19.12.11

recipe guest post: katie from lovely lady

Hello there friends! It's Monday, and Christmas is in less than a week!!!! can you believe it? I can't!

Today I have my dear friend, Katie from Lovely Lady sharing a wonderfully delicious recipe for Hot Cocoa with you! A while ago Katie commented on my honestly post here about hot coco, saying she had a delicious recipe for the best hot cocoa ever, and I asked her to share it with you! What better way to celebrate Christmas than with Hot Cocoa? I know of nothing!

-----♥-----


Hi everyone!
I was extremely delighted when Ruthanne asked me to do a guest post on this lovely blog of her's and so I of course said yes. While talking with Ruthanne after her "Honestly" post about hot cocoa, she requested that I share this recipe that I mentioned. Now first of all, my family has always been "Swiss Miss" people. We used to never make homemade hot cocoa but after Mom found this recipe we may never go back. Because this is just too darn yummy.
The recipe is from a cookbook that my Mom has called "Grandma's Recipes: Recipes from the 1920's, 30's and 40's. Sounds awesome, right?
So here it is for all you folks to try out!
Cocoa
Ingredients:
1/4 c. cocoa
1/3 c. sugar
1/8 tsp. salt
1/2 c. water
5 1/2 c. milk
1/2 tsp. vanilla
Recipe: Mix cocoa, sugar and salt in a heavy saucepan. Add water and stir until smooth. Cook 3 minutes. Add milk. Heat thoroughly. Add vanilla and beat with egg beater. Serve hot. Top each serving with marshmallow or a teaspoon of whipped cream.
It should look like this. If it doesn't, well, I think you messed it up.
Sidenote: I would like to add a few little things about what I do when I make it. I don't actually measure the salt. I just sprinkle in a tiny bit and that's it. I also sometimes add a little more vanilla. It's delish. The picture shows 1% milk but I normally use 2% milk. It makes it richer. And I stir everything with a whisk even though it doesn't say that I need to. Also I wouldn't be afraid to add some red & green sprinkles or crushed pieces of candy cane along with your whipped cream. It would be a festive(and yummy) touch for Christmas.
Enjoy!
And there you have it! A new delicious recipe for you to try out and it's perfect for these winter temps.
Thanks so much for having me, Ruthanne!

xoxo
Katie

Thank you so much, Katie! Be sure to head on over to her blog and show her some love today! 

-Ruthanne


8.12.11

the latest thanksgiving post in blog world.

People keep posting, saying they're the latest to post about thanksgiving.

Nope...


People...


That's me....yeah.

I'm terrible.

Here are a few pictures of our food - I didn't take many people pictures cause no one was cooperating. And then my step cousin thought I was crazy, taking so many pictures of the food. Oh, the joys of being me. Ha...anyway. here you are :)


That is all for my late thanksgiving post....I'm terrible. I know. And now you're probably done reading about thanksgiving for at least 11 months. 

And....over and out.

25.11.11

gone crabbin'

As you're reading this, I'm probably in the truck, driving off to the coast for the weekend, to go crabbing with my daddy and uncle! :) There's gonna be 6 of us, and we can each get 10 crab a piece...so...we've got some potential. Dungeness crab, baby, here we come! 

So, I will not really be able to post. However, if you follow me on twitter (@KROLMEISTER) you may be able to still keep up with me :) 

But I just had to share this adorableness with you.

Photobucket

That is basically what she did allllllllllll day and alllllllllllll evening.

Gotta love one year olds.

Hope your thanksgiving was fantastic and that your weekend is too! :)

xoxo,
-Ruthanne

p.s. 
no, my mother is not beating my sister..she's just moving the hair from her face. typical mom move :) 

p.p.s.
remember how I said I was gonna show you the stuff I bought last weekend with my cousin? still gonna do that. just when I get home....this week was so busy! I promise I'll get em up before next Saturday! :)

14.11.11

pumpkinny. monday. rant. you know, the norm.

So.....not to make this awkward or anything, but the last three days I have had the worst cramps of my life. True story. Today they're gone...so that's good...but still. Worst. Cramps. Ever. And I basically never get cramps...so I don't know what the deal was with that....lame. But the activities I participated in this weekend were not so lame...more to come on that tomorrow...muahahaha. And the only reason I'm doing it tomorrow is cause I have a ton of photos to edit...and I hate tuesday, so the awesomness from the photos will override the un-awesomeness of the weekend. okay? good. Glad we got that covered.

Anyway. I'm feeling pumpkinny again. {I just built a new word. Oh yeah, baby. Pumpkinny.}

P U M P K I N N Y.

Annnnnnnnnnnnnnnnnnnnnnyway.

I decided to do something about it......

Again.


This is what I decided to do today...after I take a biology test...and write two essays, and then do more algebra...and laundry...and all that. Oh yeah and then there's worship practice at 4....but yeah. It's happening today. Even if it happens at midnight....or something like that.

Yeah.

That's my monday rant...I feel better now.

What did you do this weekend?

Happy monday! Hope you all had a fabulous weekend, doing whatever it is you did! xoxo


19.10.11

yummy hot artichoke dip

I am on a recipe kick these days! MAN! Remember that picture of artichoke toast that I posted in last weekday wanderings? Well, I wanted to share the recipe with you, cause it was so yummy and delicious!

Recipe slightly adapted from Paula Dean

Three Cheese Hot Artichoke Dip

  • 1 (8 ounces) block cream cheese, softened
  • 3/4 cup + 1 tablespoon mayonnaise
  • 1 (14 ounces) can artichoke hearts, drained and chopped - to your preference. I like bigger chunks, but you may be different.
  • 1/8 cup chives (or 2 green onions, chopped)
  • 3/4 cup grated Parmesan (I use a blend of different kinds - we like our cheese in this house!)
  • 1 1/8 cup shredded mozzarella
  • 1/2 teaspoon hot sauce 
  • 1/2 teaspoon Worcestershire sauce
  • Salt and pepper

Directions

Preheat oven to 350 degrees F.
In a large mixing bowl, beat the cream cheese with a hand held electric mixer until smooth. Then beat in the mayonnaise until smooth. Add remaining ingredients and stir together until combined. Transfer the dip to a pie plate or shallow gratin dish. Bake in a preheated oven for 30 to 40 minutes until the top is golden brown and the dip is bubbling. Serve hot with crackers, tortilla chips, crostini or veggies.

There ya go! Like I said, I got this recipe from Paula Dean on FoodNetwork.com, and adapted it to what I/my dad likes. It's sooooo yummy && delicious! I personally like to put it on sourdough toast - so so so so SO yummy! (note: that is obviously my fav word today...yummy! hahaha)

xo, 
Ruthanne

pumpkin monkey bread ♥


So I made that yummy pumpkin monkey bread I posted about a while ago...let me tell you this. It's delicious! :) so yummy, and not overly sweet - SCORE!

Anyway. I started taking pictures then got distracted cause I had to let it rise twice, and I got bored and forgot about my pictures. Typical. And then it was devoured so quickly I didn't have time to even get a picture of the finished product! Rats! Oh well, though. Here are just a few pics of the process before my "distraction-syndrome" kicked in ;) hehehe.


welp, that's all I have for you! But, I definitely recommend making the bread - it's fabulous and a great kids snack! :) 

xo, 
Ruthanne

12.10.11

pumpkin spice and everything nice

I have a great love for pumpkin and spice. I literally cannot wait for fall every year because of those two delicious elements, among other things. So I set out to find some super  yummy recipes to share with you, some of which I know I will have to try myself this year, you can count on it!!!

note: I have not made any of these thus far (minus one recipe)..they just look delicious and amazing and yeah :) also? I like cupcakes, as you will see. seriously. My brother mocks me so much for it. 


Pumpkin Monkey Bread - 9


Iced Pumpkin Cookies (these were fantastic, really yummy!)


pumpkin-cookies


Pumpkin Latte coffee cake


Melt-in-Your-Mouth Pumpkin Cookies


Okay. I'm done. Too much pumpkin, I know. But now I need to go buy a bajillion cans of pumpkin puree, and lock myself in the kitchen for a week to make all this. Holy cow so delicious. If you make any of these, let me know how it goes in an email or something! I'd love to know! :)